Just want to know which GPS modules are the most popular? Then check out this list:
These are the most popular GPS modules for FPV drones (as of June 2025):
Still not enough for you? Then check out our store. We have an even wider selection of GPS modules for FPV drones.
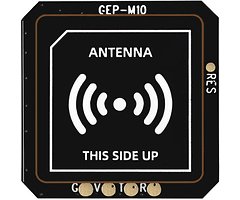
A GPS (Global Positioning System) module is a small electronic device that receives satellite signals and uses them to determine your exact position in real time. In the world of FPV (First Person View) drones, GPS is playing an increasingly important role—not just for long-range pilots, but also for anyone who prioritizes safety and wants features similar to those found on traditional drones.
These modules typically work with multiple satellite systems simultaneously, such as GPS, GLONASS, BeiDou, or Galileo, to calculate a position as quickly and reliably as possible.
A GPS module adds a whole range of practical and safety-related features to your drone. Here’s why it’s worth it:
Want to simply “park” your drone in the air for a moment? The Position Hold feature makes exactly that possible. You can easily activate it by flipping a switch on your transmitter, and the copter will automatically remain at a fixed position and altitude. This is useful if you’ve lost your bearings or just want to take a quick breather.
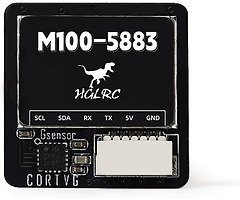
This only works with reliable GPS reception and a stable GPS module. A great choice for builds that prioritize precision is the HGLRC M100 Pro GPS with QMC5883L Compass —it’s especially compact yet powerful.
One of the most important advantages of a GPS module is Return to Home (RTH). If your video feed cuts out or you accidentally fly too far—don’t panic! With the RTH function set up correctly, your drone will automatically return to its takeoff point.
In Betaflight, GPS Rescue is often used for this—a kind of streamlined RTH that gets you safely out of tricky situations. Prerequisites: a properly configured GPS with a sufficient satellite lock and a correctly set home position.
It’s worth noting here that GPS functionality on FPV drones isn’t as advanced as it is on DJI drones, for example. Many beginners enter the FPV hobby expecting that GPS and Return to Home (RTH) will work just as reliably as they do on DJI drones—but that’s a common misconception. While DJI offers a highly integrated system in which GPS, compass, barometer, and numerous sensors are perfectly coordinated, GPS functions in the FPV sector tend to be rudimentary and must be configured manually. Although flight controllers like Betaflight or iNAV offer RTH features such as GPS Rescue, these aren’t as “smart” or forgiving of errors. There’s no automatic obstacle detection, no dynamic flight profile, and no reliable landing function—at best, your copter will fly back and hover over the takeoff point. So if you want to use RTH, you shouldn’t just trust it—you should know exactly how the feature works, test it thoroughly, and, when in doubt, fly back manually. In FPV, RTH is more of a backup—not an autopilot.
Have you lost control and your drone has crashed somewhere? Using GPS data from the telemetry on your transmitter or the coordinates in the OSD, you can pinpoint the last known location—and search for it specifically. When used with an acoustic buzzer like the Vifly Finder 2, the search on the ground becomes even easier.
Tip: Display the GPS coordinates in the OSD and always record a DVR feed through your goggles. That way, after a crash, you can review the footage and use the coordinates to see where the copter might be. If the battery has fallen out of your copter or the copter is lying in a low-lying area, it won’t be able to transmit the coordinates to you anymore. However, you’ll still be able to see the last coordinates in the recording.
We’ve also uploaded two interesting videos on our YouTube channel about finding a lost drone:
Finding a Lost FPV Drone – Our Top 5 TIPS
Find Your FPV Drone with This Little Device
If you’re flying long range, a GPS module is a must-have. As soon as you fly more than a few hundred meters, you’ll need precise information about:
Thanks to GPS, you’ll always know if you have enough power left for the return flight. Waypoint navigation is also possible in iNAV with GPS—making it perfect for planned trips.
Not all GPS modules are the same—there are noticeable differences, especially in terms of reception performance, acquisition time, and number of satellites. In the FPV world, the u-blox modules from the M8, M10, and M100 series are particularly relevant. Here’s a quick comparison to help you make the right choice for your setup:
When first powered on (cold start), it often takes longer for a GPS module to find satellites—for example, 30–60 seconds for the M8, but often less than 20 seconds for the M10. A hot start (e.g., after a quick battery swap) is significantly faster. This requires that the module supports hot starts—that is, it must be able to cache data and retrieve it later.
Modern modules like the M10 or M100 often receive signals from 20 or more satellites, while older M8 models typically receive signals from 12–16. More satellites mean better accuracy and more stable reception—which is particularly relevant for GPS Rescue.
Position accuracy for FPV GPS modules typically ranges from 1–3 m. A compass and barometer further improve position assessment, especially for functions like Hold or RTH. Many modules come with a built-in magnetic compass—for example, the Flywoo GOKU GM10 Pro V3 GPS w/compass.
Size
Another important factor is the size of the module. Some drones have 3D-printed mounts that only accommodate modules of a specific size. Before purchasing, consider where you want to place the module and, if necessary, measure how much space you have available. You’ll usually find the dimensions of the individual modules listed in the product description in the online store.
A GPS lock (also called a “fix”) is the moment when your GPS module has received signals from enough satellites to calculate your position reliably. For FPV drones, a true lock is usually only meaningful with at least 6–8 satellites—only then can you safely use features like GPS Rescue.
Sometimes, though, it takes… and takes… and takes. Here are some tried-and-true tips to speed up the lock:
How quickly a GPS module acquires a fix also depends heavily on the environment. It works much faster in open terrain than between buildings or under trees, where the signal is disrupted or reflected. Extreme weather such as thunderstorms or thick clouds can also impair reception, while light rain has hardly any effect. But we don’t fly in bad weather anyway. ;)
The module’s position is also crucial: It should be mounted on top of the drone, aligned horizontally, and with a clear view of the sky. Sources of interference, such as ESCs or VTXs, should be as far away as possible—otherwise, the time to acquire a fix will increase significantly, or the connection will remain unstable.
Pro tip for the impatient: If you’re in a real hurry, you can also power the GPS module before turning on the flight battery (e.g., via USB or a separate power source) so it can establish a lock undisturbed while you prepare your setup.
Important: Never take off without a GPS lock if you rely on features like RTH.
Most FPV pilots today rely on Betaflight—for precise acro flying and easy configuration. Those who want to use GPS more extensively—for example, for waypoints or true autopilot flights—turn to iNAV. Both reliably support GPS modules as long as they are correctly connected and configured.
In Betaflight, GPS is mostly used for GPS Rescue, a simplified RTH function. iNAV additionally offers Position Hold, Auto Launch, Auto Land, and complex mission modes—ideal for long-range copters. Both systems automatically detect modules when everything is wired correctly.
Most GPS modules communicate via UART (serial interface)—so you’ll need a free RX/TX port on your flight controller. The connection is usually made as follows:
Make sure you use the correct voltage output—some modules only run on 3.3 V, while others work fine with 5 V. Some GPS models also have a built-in magnetic compass—this must be connected to a separate I2C port if you want to use it (e.g., in iNAV).
GPS modules are sensitive to electromagnetic interference (EMI)—and there’s plenty of it on an FPV copter: ESCs, VTX, FC, RX… all of these can negatively affect GPS reception. The video transmitter (VTX), in particular, is a major source of interference that can completely overwhelm the GPS module if placed too close.
So the rule is: Keep it as far away as possible! The ideal spot for your GPS is at the rear of the copter, far away from the stack, antennas, and ESCs. Some frames even come with their own GPS mounts—if not, lightweight 3D-printed mounts or self-adhesive pads can help create some distance. Tip: Keeping a distance of 5–8 cm from other components often results in noticeable improvements.
We offer a variety of 3D-printed GPS mounts for many frames in our online shop. If your frame isn’t listed, we can also print your 3D files.
GPS antennas are designed to receive signals from the sky. This means your module should be positioned as horizontally as possible and at the very top of the copter—not at an angle, not on the side, and under no circumstances below carbon plates or other electronic components.
Common mistakes include, for example, mounting the antenna under the top plate, right next to the VTX antenna, or too close to the carbon fiber. This not only blocks the signal but can also lead to a delayed satellite lock or “jitter” in the position signal. The ideal setup is an unobstructed area with a clear view upward—even on small copters with limited space, it’s worth getting creative with the installation.
Once the module is physically connected, you’ll need to enable the corresponding UART in Betaflight or iNAV. In Betaflight, this is done under the “Ports” tab, where you enable “GPS” on the correct UART.
Make sure the baud rate is set to 57600 or 115200—both work with most modern modules.
In the “Configuration” tab, enable “GPS” as a feature and set the protocol to UBLOX, which is the standard for almost all FPV modules. Once everything is connected correctly, you’ll see the number of satellites and the position in the Betaflight GUI—by now, at the very latest, you’ll know: It works!
GPS Rescue is your guardian angel in Betaflight—if the connection to the receiver is lost, your copter automatically flies back toward its takeoff position. Sounds awesome, right? It is—but only if you set it up correctly.
First, if you haven’t already, go to “Configuration” → “Features” and enable the GPS option. Then go to the “Failsafe” tab, enable GPS Rescue, and adjust the most important parameters:
Very important: Test, test, test! It’s best to use a switch for this before relying on the actual failsafe. To do this, take off from a distant location, manually activate Rescue, and observe whether the copter returns smoothly.
If you’re using GPS Rescue, you’ll also need to configure the failsafe logic correctly in Betaflight. Under the “Failsafe” tab, set Stage 2 Failsafe to “GPS Rescue.” This means that if your receiver loses connection (e.g., due to range limitations or a power failure on the transmitter), the system won’t disarm—instead, GPS Rescue will be triggered.
Recommendation: Also set up a switch on your radio transmitter that allows you to manually activate GPS Rescue. This gives you maximum control—not only in the event of signal loss, but also if, for example, you lose your bearings.
Always keep in mind: GPS Rescue is a backup, not an autopilot. You should still always be able to fly manually—Rescue does not replace piloting skills, but rather enhances them with safety. It’s best to take back control as soon as reception is restored or you’ve regained your bearings.
GPS in FPV drones is extremely useful, but it’s not always flawless. A common problem is failing to acquire a “satellite fix.” Even though everything seems to be connected correctly, the module finds no satellites or too few. This is usually due to poor placement—for example, too close to ESCs, the VTX, or under carbon plates. The surroundings also play a role: in narrow valleys, between buildings, or under trees, reception can be severely impaired. Another problem is “position drift,” where the GPS position slowly shifts even though the drone is stationary. This usually happens when the signal is weak or due to electromagnetic interference. The latter is caused by power-hungry components such as ESCs or powerful video transmitters. If you notice such interference, you should mount the GPS farther away from the stack or use interference-suppressed power supplies. A good placement with a clear view of the sky is crucial.
Logs are helpful for troubleshooting—either via the black box in Betaflight or through Mission Planner in iNAV. There, you can see exactly how many satellites were received, how stable the signal was, and how the position changed during the flight. This makes it easier to understand and specifically resolve unexplained behavior during GPS Rescue or sudden signal dropouts.
Use the Betaflight Blackbox Explorer to analyze GPS values recorded during flight. Pay attention to:
gps_numSat (number of satellites)gps_fix (whether a fix was ever established)gps_home_distance and gps_speed (return flight behavior)A GPS module isn’t a mandatory upgrade for every FPV copter—but it can be a huge boost to safety and convenience. If you only fly in the park, never go far, and always maintain visual contact, you don’t necessarily need one. But as soon as you take on a bit more risk—for example, flying behind trees, going long range, or simply wanting an emergency backup—GPS is worth its weight in gold.
Even for beginners, GPS can be a mental relief: having the option to call for rescue—or at least being able to check altitude, speed, and distance on the OSD—builds confidence—especially when things go wrong. And if you use iNAV, you benefit twice over: here, GPS is practically standard equipment.
In short: If you want to do even a little more than just fly over meadows—install a GPS. No matter which one you choose, make sure it’s properly integrated and configured. A good GPS is only as good as its placement, power supply, and the software behind it.
One more quick note: A while back, we uploaded two videos on GPS modules for FPV drones to our YouTube channel. These videos are no longer up to date, and Betaflight has evolved since then. However, the videos still provide a good introduction to the topic and demonstrate the basic process. That’s why we don’t want to withhold these videos, but we do ask that you familiarize yourself with the setup process in the current version of Betaflight.
Image source: GEPRC, iFlight